
LAND & LIFE ADVICE
A DIY cedar planter for heat-loving herbs
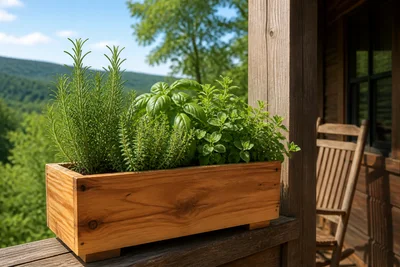
A cedar planter gives basil, rosemary, thyme, oregano, and other heat-loving herbs a useful home close to the kitchen, porch, or deck. It does not need to be large or ornate. What matters is enough root room, reliable drainage, and a location that gets the sun the herbs need. Cedar is a practical choice because it handles outdoor moisture well, stays relatively light, and looks at home beside a patio or dock without needing a heavy coat of paint.
Start with the herbs and location
Choose the plants before deciding on the planter dimensions. A shallow, narrow box may work for thyme and oregano, while basil and rosemary need more room to spread. Watch the intended spot for a full day and notice when direct sun arrives and when heat reflects from concrete, metal, or siding. Herbs that love warmth still need consistent moisture, so a sunny location close enough to check while cooking or watering other containers is more useful than a perfect-looking planter placed out of the way.
Build drainage into the first cut
Use clean cedar boards, square cuts, and a bottom that lets excess water escape. Drill several drainage holes or build with small gaps between lower slats, then raise the planter slightly with feet or a simple base so water does not stay trapped underneath. Predrill near board ends to reduce splitting, and sand the top edges before filling it with soil. A straightforward rectangular shape is easy to repair, replant, and move if the light changes through the season.
- Make the planter deep enough for the roots of the herbs you selected.
- Use drainage holes and a raised base before adding soil.
- Place the box where harvesting herbs becomes part of the normal routine.
- Water deeply when the top inch of soil is dry, then let excess water drain.
Keep harvest and care close together
A planter succeeds when the herbs are easy to use before they become overgrown. Keep clean scissors nearby, harvest a few stems at a time, and watch how the plants respond after trimming. The growing advice in warm-weather herbs that thrive in planters offers the same practical reminder: match each herb to the light, container, and attention you can realistically provide.
If a built-to-order setup would better fit a deck, patio, or dock, the custom Kratky method planter boxes page shows how a growing space can be designed around the way you actually use your outdoor area. A useful planter should make watering and harvesting easier, not add another difficult corner to maintain.
Use dependable information for growing decisions
Weather, planting timing, and herb care all change with the season. The University of Missouri Extension provides Missouri-specific guidance that can help when you are deciding how to plant, water, protect, or harvest herbs through hot weather.
For broader garden and food information, the USDA National Agricultural Library offers research-based resources on crops and home growing. Use reliable sources when details matter, then let the plants and conditions in front of you guide smaller adjustments.
Feed the soil, not the clutter
Start with a quality container mix rather than filling a small planter with dense native soil. Herbs need air around their roots as well as water, and heavy soil can stay wet longer than a cedar box needs. Refresh the top layer when it becomes compacted, and use fertilizer only according to the needs of the plants you chose. A small, well-tended planter is more productive than a larger box crowded with too many herbs competing for the same moisture and light.
Let the planter improve with use
After a few weeks, check whether the box holds moisture too long, dries too quickly, or needs to be moved out of the harshest afternoon heat. Those observations are more valuable than adding unnecessary features at the beginning. A simple cedar planter that drains well, gets used often, and keeps fresh herbs within reach is already doing the job it was built for. Harvest regularly, watch the leaves, and let the planter become part of the rhythm of cooking and being outside. Keep notes on varieties that thrive, then repeat what works next summer.